SendSafely users can use our SendSafely Chrome Extension to send files directly from Gmail. This page will provide you instructions on how to get the extension set up and configured on your computer.
Step 1 - Install the Chrome Extension
The SendSafely Chrome Extension is available for free from the Chrome Web Store. Once installed you will see the SendSafely orange "padlock" icon in the top right corner of the browser (next to the address bar).
Step 2 – Log in
Before you can use the extension, you will need to launch the pop-up window and provide your SendSafely credentials on the “Configure” tab of the popup window. You can login with a SendSafely user name and password or Google login.
Clicking "More Options" displays additional configuration settings. Here you can optionally enter the Host Name of your SendSafely portal (e.g. example.sendsafely.com). This is useful if your company has multiple SendSafely portals and you wish to access a specific portal.
Step 3 – Enable Gmail Integration
On the Configure Settings tab, there is an on/off switch labeled "Gmail Integration" that will allow you to enable integration with the Gmail web interface. Once enabled, you will be prompted to reload any active Gmail windows.
NOTE: You must be logged into Gmail using the same email address used to log into the Chrome Extension
Once enabled you will have the option to upload Secure Attachments, or encrypt the entire message.
Secure Attachments:
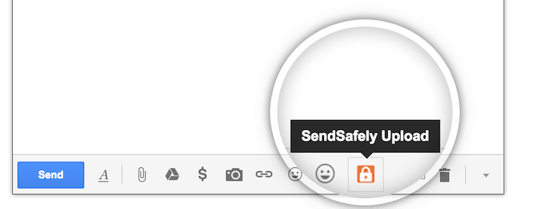
The “Attach with SendSafely” button (located next to the Gmail “Attach File” button) works in much the same way as adding a normal attachment, however files will be encrypted and uploaded to SendSafely instead of attached to the email message.

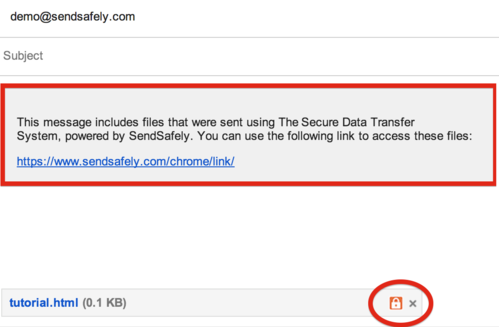
You’ll know the file was attached with SendSafely if you see the orange padlock on the attachment icon (see below). A placeholder is added to your message where the secure link will go once the message is sent.

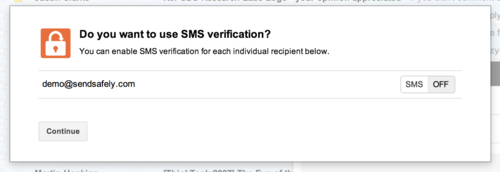
When you hit Send, you’ll be asked to configure SMS verification (optional) for each of your email recipients. Then press Continue to send the email.

Encrypting an entire Gmail Message (not just attachments)
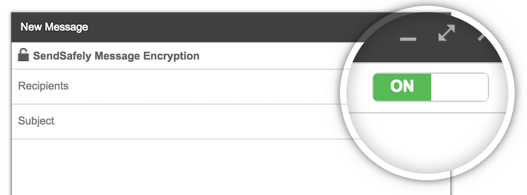
SendSafely's Gmail integration also supports Message Encryption, which protects the entire email message (not just attachments). You can enable this option on a per-message basis by toggling the switch at the top of the Gmail compose screen as show in the image below. When Message Encryption is enabled, attached files will also be sent using SendSafely. You'll typically want to use this option only when the email message body includes something sensitive.

Step 4 – [Optional] Edit Customized Link Template.
When you attach a secure file to an email using the SendSafely button, by default the below attachment dialog (in grey) is inserted into the body of the email:
You have the option to customize the display and content of this message by toggling on the Customized Link Template slider and making edits to the text displayed below.
Step 5 – [Optional] Enable File Saver for large file downloads
The File Saver feature in the SendSafely Chrome extension allows SendSafely to use a separate unlimited Local Storage cache, which is very useful for large file downloads. This addresses an issue where the Chrome browser runs out of space in its local cache, which is where a downloaded file is buffered during the decryption process. If you use multiple SendSafely web portals, each should be added to the File Saver Site list.
Comments
0 comments
Article is closed for comments.