The agent app can be installed directly from the Zendesk Marketplace. After you install the app, configure the below settings from the Settings -> Manage Apps interface:
Require authentication by default for outbound files
- The option determines whether end-users (non-agents) are required to authenticate when receiving files. This option can be overridden on a per-file basis by the agent when sending a file.
Add all agents as recipients for outbound files
- When this option is selected the agent app will automatically add the following individuals as recipients on every outbound package:
- Ticket Requestor
- Users listed in the "Ticket CCs" and "Followers" fields
- All members of the Zendesk Agent role
- All members of the Zendesk Admin role
- This configuration is useful if all of your agents require access to outbound files to provide support for your customer base.
- If this option un-checked only the following individuals will be added as recipients on outbound packages:
- Ticket Requestor
- Users listed in the "Ticket CCs" and "Followers" fields
- Agents (or agent groups) listed in the "Assignee" field
- This configuration allows only the assigned agents and CC's (including requestors) to access the item. This is useful if you have a large number of agents (or sub-teams of agents) where it may not be appropriate for all agents to have access to every outbound files.
Insert a hyperlink to access files instead of a URL
- If this option is selected, the SendSafely Link inserted into the ticket is replaced with a text-based hyperlink that says "Use this link to access the attached files".

- If not selected, the Un-formatted SendSafely link is inserted into the ticket:
Block agents from sending unencrypted Zendesk attachments
- When enabled, agents will receive a warning message any time files are attached using the Zendesk paper clip in the ticket editor. Agents are guided to remove the unencrypted attachment and use SendSafely instead. The agent is unable to submit the ticket until the unencrypted attachment is removed.
SendSafely Portal Host Name
Organizations with multiple SendSafely portals should specify which portal they are integrating with this Zendesk instance by providing its URL here.
Enable Role and Group Restrictions
Lets you control which agent roles and groups can see the app. By default, the app is available to all agents (although it requires them to register with SendSafely before they can use it).
Using the SendSafely Agent App
The SendSafely agent app is designed to streamline the process of viewing files or messages that were attached using the SendSafely Help Center Attachment Widget or Dropzone connector. The Agent App runs in the sidebar of the Zendesk Agent interface when viewing or editing a ticket (as shown below).
The agent app works by inspecting the active ticket for SendSafely “Secure Links”. The list of files or messages associated with Secure Link(s) on the active ticket will be displayed in the sidebar. Clicking on the file in the sidebar will allow you to download each file.
If you load the Agent App and you are not authenticated to SendSafely, you will be prompted to Log in to SendSafely. Clicking this button will open a new tab that will allow you to either authenticate to SendSafely or register a new account. Once you authenticate, the new tab will close and the Agent App will automatically refresh.
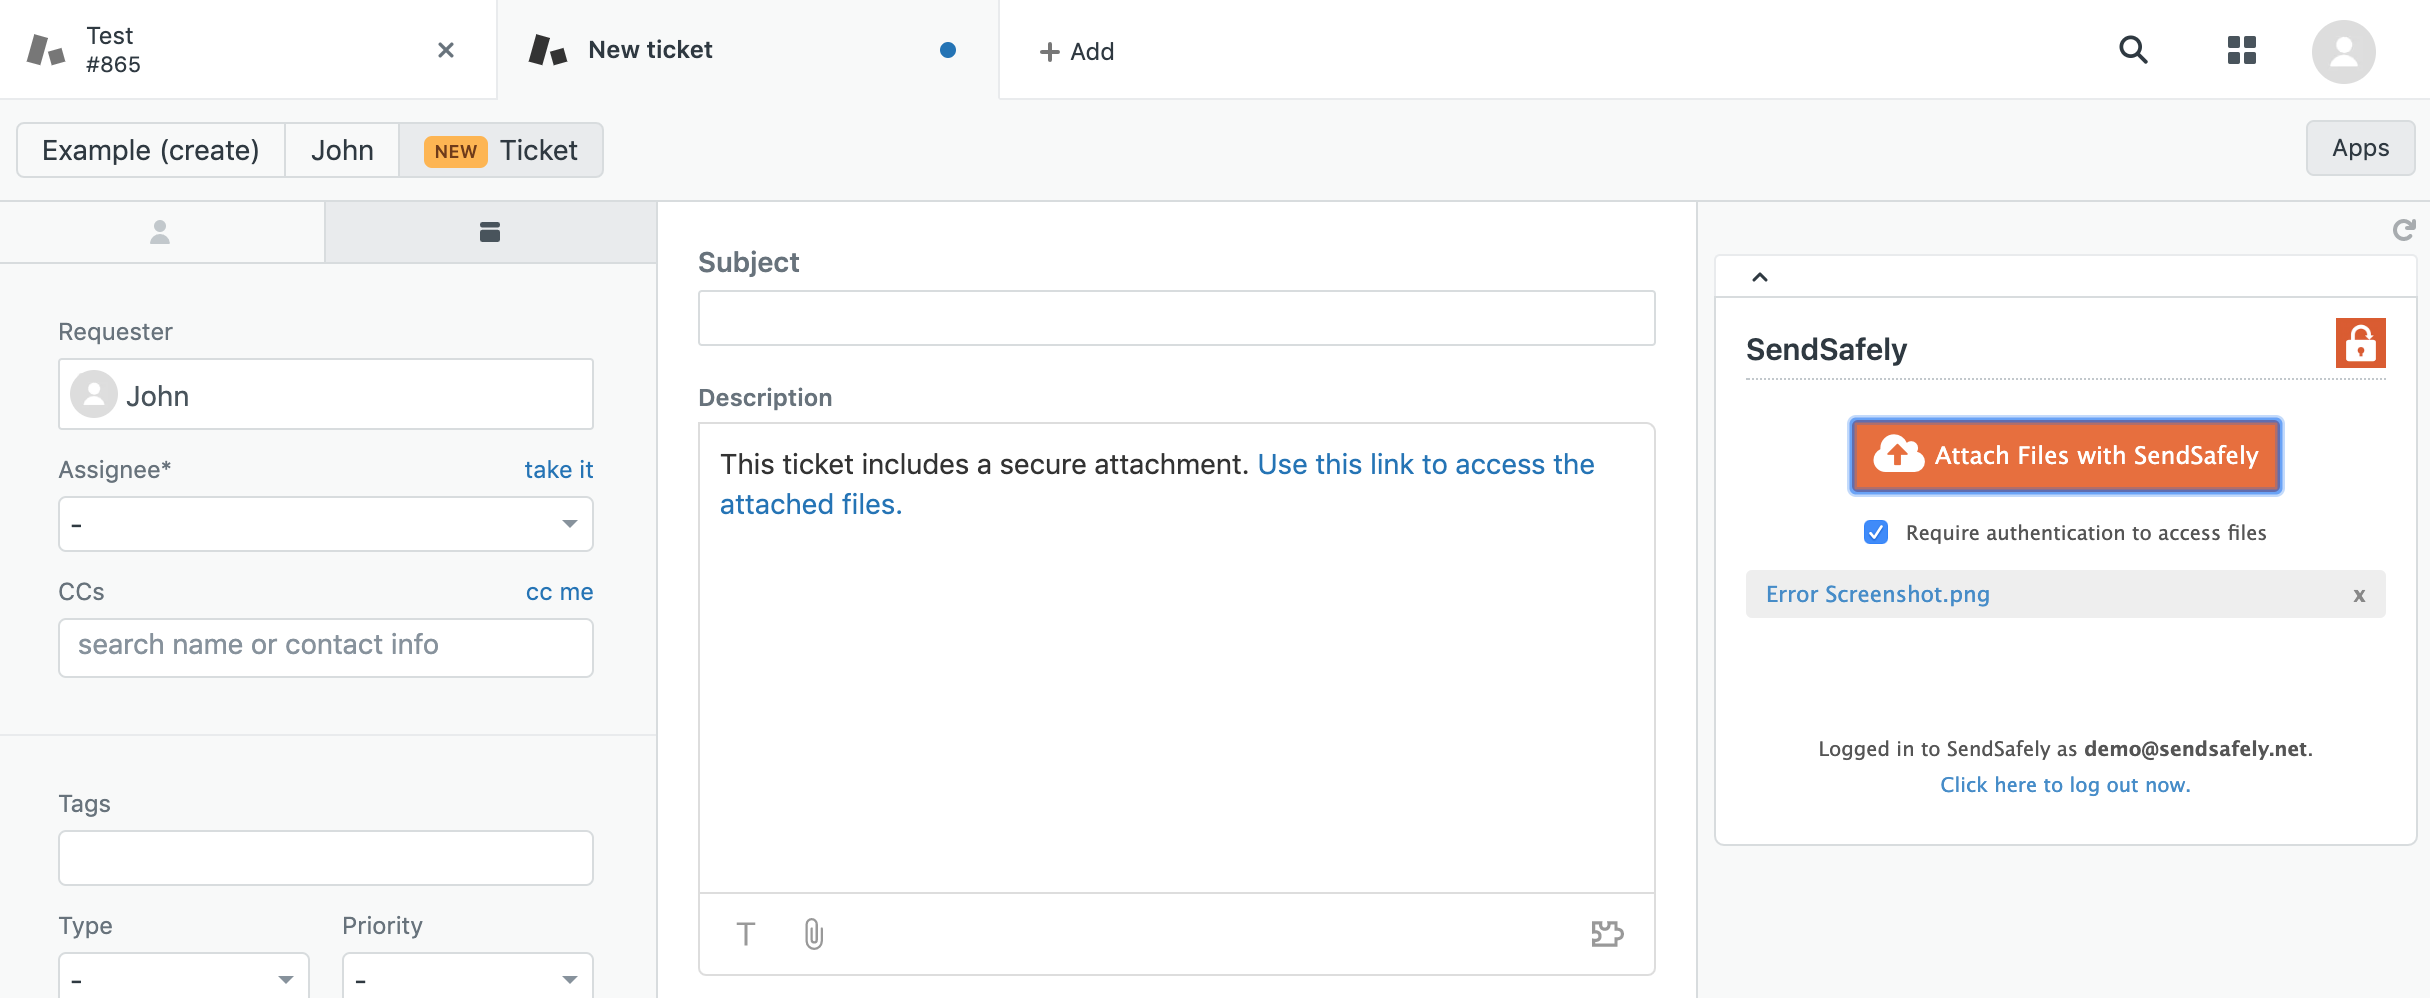
In addition to viewing submitted files, the SendSafely Agent App can also be used to send files and messages back to your users. To send a new file in a ticket reply, use the orange cloud button in the sidebar app to attach a new file as shown below.
Clicking the button will allow you to choose files from your local machine to attach to the reply. Once a file is chosen and uploaded, you will see the secure link automatically appended to the reply field.
Do not use the built in “Attach File” button in the Zendesk reply dialog to attach files as this button will bypass SendSafely and upload file using the built-in Zendesk mechanism.
Also note that when sending files to a user, the agent will have a checkbox option “Require authentication to access files”. When this checkbox is enabled, the end-user will be required to enter an Email Verification Code before being allowed to access the files. If this option is not checked, only the link within the ticket reply will be needed to access the files.
When sending sensitive files, always enable the “Require Authentication” option. Not enabling this option allows anyone with access to the Zendesk Ticket (including email recipients) to access the files.
Comments
0 comments
Please sign in to leave a comment.